

Lash Mapping: How to Create a Perfect Set Every Time?
Looking for flawless lash extensions? Lash mapping is what you need honestly. It gives you the perfect style every time. It’s basically a guide or plan for you. This plan marks where every lash extension belongs.
For lash artists, lash mapping is really not that hard. Basic steps are basically all you need to understand. We’re breaking down everything in this guide for you. You’ll map lashes like a pro before you know it. You’ll get tips that genuinely make things easier. And your clients will seriously love how their lashes look.
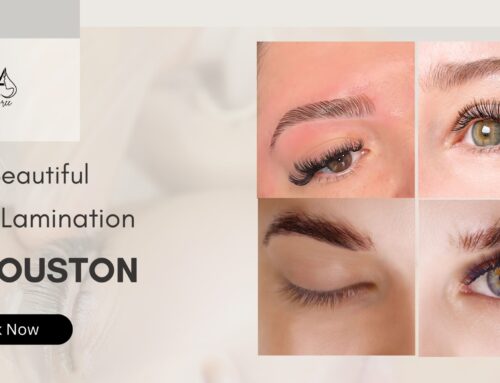
At Lashes by Aree, we use lash mapping for every client in Houston. This technique helps us match your eye shape. Ready to go? We’ll tackle the basics first and move up!
What Is Lash Mapping and Why Does It Matter?
Lash mapping is a planning technique for lash extensions. Before applying any lashes, you create a detailed map. This map shows the exact placement of each extension. It considers your client’s natural eye shape. It also respects their natural lash health.
Think of it like drawing before painting. The map guides your entire application process. Without it, lashes might look uneven or wrong. With proper eyelash extension lash map techniques, every set looks balanced.
Why is this important? Because every person’s eyes are different. Some have round eyes, others have almond eyes. Some want cat eye looks, others prefer doll eyes. A good map ensures you deliver exactly what they want.
At our Houston studio, we never skip this step. Lash mapping helps us achieve perfect symmetry. It ensures both eyes look identical. It also prevents mistakes that waste time and materials.
When you master this skill, your work improves dramatically. Clients notice the difference right away. They come back because they trust your precision. They also tell their friends about your amazing work.
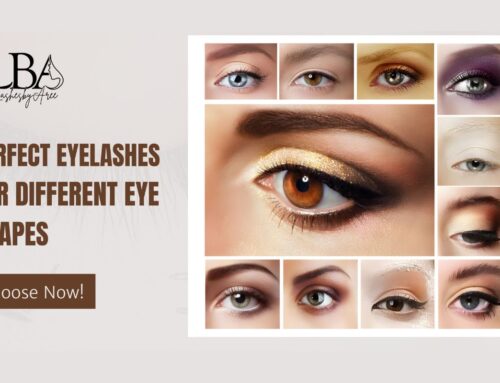
Understanding Different Eye Shapes for Lash Mapping
The lash mapping eye shape guide starts with identifying eye types. Different eyes need different approaches. Learning these differences is your first step to success.
Almond eyes are the most common shape. They look like almonds from the side. These eyes work well with most lash styles. You can try natural looks or dramatic styles.
Round eyes appear larger and more open. They show more of the white part. For these eyes, a cat eye lash map works best. This means longer lashes at the outer corners. This creates a lifted, elongated effect.
Hooded eyes have extra skin covering the lid. The lash line might not be fully visible. For these, focus on the middle lashes. Make them longer to open up the eyes. Avoid heavy outer corners that weigh down the look.
Monolid eyes have no visible crease. They look flat across the lid. A doll eye map works great here. Use even length across the entire lash line. This creates a rounder, wider appearance.
Deep set eyes sit further back in the socket. They need more attention to the center. This brings the eyes forward visually. Avoid super long lashes that might look heavy.
At Lashes by Aree, we assess every client’s eye shape first. This ensures we pick the right lash mapping technique. Your client’s satisfaction depends on getting this step right.
Step-by-Step Lash Mapping Process
The first move in step-by-step lash mapping is a clean workspace. Get all your tools organized and ready. Taking time to prepare makes the entire process flow easier.
Step 1: Consult With Your Client
Talk about what they want. Do they want natural or dramatic? Ask about their daily routine too. This helps you understand their lifestyle needs.
Step 2: Clean The Natural Lashes
Wipe off all makeup, oil and any debris. Use something like a gentle lash cleanser. Having clean lashes means extensions bond much better.
Step 3: Analyze The Eye Shape Carefully
Look at both eyes from different angles. Check if they are symmetrical or different. Note any unique features or concerns.
Step 4: Mark The Key Points
Use a mapping pen or sticker. Mark the inner corner, center, and outer corner. These points guide your entire placement.
Step 5: Decide On Lash Lengths
The inner corner needs shorter lashes usually. The center gets medium length lashes. The outer corner can have longer ones. This creates a natural gradient.
Step 6: Choose The Right Curl Type
Different curls create different effects. J curl looks natural and subtle. C curl gives more lift and drama. D curl provides maximum drama and lift.
Step 7: Plan The Density And Volume
Decide how many lashes per natural lash. One lash for classic style. Multiple lashes for volume looks.
Step 8: Create Your Physical Map
Draw or mark your plan clearly. Make sure you can follow it easily. A clear map prevents confusion during application.
This custom lash map design process takes practice. At first, it might feel slow. But soon, it becomes second nature. Your speed and accuracy will both improve dramatically.
Lash Mapping Techniques for Beginners
Lash mapping techniques for beginners don’t have to be complicated. Start with simple styles first. Master the basics before trying advanced looks.
The Classic Map is perfect for learning. Use one extension per natural lash. Keep lengths relatively even throughout. This style forgives small mistakes easily.
The Natural Gradient Map adds slight variation. Make the inner corner shortest at 8mm. The center grows to 10mm or 11mm. The outer corner reaches 12mm maximum. This creates a soft, natural sweep.
The Open Eye Map works for most clients. Focus length at the center point. This makes eyes appear larger and awake. Use slightly shorter lashes at both corners.
Practice your lash mapping extension zone lengths on paper first. Divide the eye into zones or sections. Typically, you’ll have five to seven zones. Each zone gets a specific length assignment.
Use mapping stickers for easier visualization. These stickers have pre-marked zones. They help you see your plan clearly. They are especially helpful when you are still learning.
Remember that step-by-step lash mapping gets faster over time. Your first map might take 15 minutes. After some practice, you’ll finish in 5 minutes. The quality will also improve with each attempt.
At Lashes by Aree, we teach these basics to all new artists. These foundations make advanced techniques much easier later. Never rush through learning the fundamentals properly.
Creating Different Lash Styles with Mapping
Lash mapping lets you create many different styles. Each style serves a different purpose. Learning multiple styles makes you more versatile.
Cat Eye
The Cat Eye Look is very popular today. This uses the cat eye lash map technique. Place your longest lashes at the outer corners. This creates a lifted, sexy appearance. The inner corner stays short and natural.
Doll Eye
The Doll Eye Style makes eyes look rounder. Use your longest lashes at the center. Both corners should be shorter than the middle. This opens up the eyes beautifully. It works great for clients wanting cute looks.
Natural Style
The Natural Style mimics real lash growth patterns. Use subtle length variations throughout the line. No dramatic jumps in length anywhere. This style suits everyday wear perfectly.
Squirrel Style
The Squirrel Style combines elements of both cat and doll. The longest point sits just before the outer corner. This creates a lifted yet soft appearance. Many clients love this balanced look.
Wispy Style
The Wispy Style alternates between different lengths randomly. This creates texture and movement. It looks very natural and feathery. Great for clients wanting something trendy.
Each style requires different approaches to creating an eyelash extension lash map. Practice drawing these maps before trying them on clients. Understanding the theory makes practical application much easier.
Our Houston team at Lashes by Aree masters all these styles. We help clients choose based on their features. The right style can dramatically enhance natural beauty.
Tools and Materials for Perfect Lash Mapping
Good tools make lash mapping much easier and faster. Invest in quality supplies from the start. Cheap tools often create more problems than solutions.
Mapping Pens Or Pencils
Mapping pens or pencils let you mark directly on tape. Choose skin-safe, removable markers only. These should wipe off easily after application.
Mapping Stickers Or Tape
Mapping stickers or tape provide a clean marking surface. They also help separate bottom lashes during work. Look for hypoallergenic, gentle adhesive types.
Precision Tweezers
Precision tweezers are essential for accurate placement. Get both straight and curved tip tweezers. Different angles need different tools. Lash extensions in various lengths give you flexibility. Stock lengths from 8mm to 15mm minimum. Having more options helps you create better maps.
Different Curl Types
Different curl types expand your creative options. Keep J, C, and D curls in stock. Some clients might need B or L curls too. Fast-drying types work well for experienced artists. Slower types suit beginners better while learning.
Lash Primer Or Cleanser
Lash primer or cleanser prepares natural lashes properly. This removes oils that prevent good bonding. Clean lashes equal longer lasting extensions. A good light source helps you see clearly. Poor lighting causes mistakes and eye strain. Invest in adjustable, bright LED lights.
Measuring Tools Or Rulers
Measuring Tools or Rulers help maintain consistency. Some artists use digital calipers for precision. Others prefer simple ruler markings. At Lashes by Aree, we use only premium quality products. Our Houston clients deserve the best materials always. Quality tools also make your job easier and more enjoyable.
Common Mistakes in Lash Mapping to Avoid
Even experienced artists make lash mapping mistakes sometimes. Learning what to avoid saves you trouble later. These common errors hurt your final results.
Skipping The Consultation
Skipping the consultation is seriously a huge mistake. Don’t ever assume you know what clients actually want. Always ask detailed questions first. Miscommunication leads to unhappy clients.
Ignoring Natural Lash Direction H3
Ignoring natural lash direction causes problems. Some lashes grow downward or sideways naturally. Your map must work with these patterns. Fighting natural growth looks messy and unnatural.
Asymmetrical Maps
Creating Asymmetrical Maps is very noticeable. Both eyes must match as closely as possible. Take time to measure and compare constantly. Step back frequently to check your work.
Using Long Lengths
Using lengths that are too long damages natural lashes. Heavy extensions stress the follicles unnecessarily. Always consider the health of natural lashes first. Not adjusting for eye shape results in unflattering looks.
Forgetting About Lash Health
Forgetting about lash health can cause damage. Check the condition of natural lashes carefully. Weak or damaged lashes need lighter extensions.
Poor Zone Planning
Poor zone planning creates uneven looks. Make sure your zones transition smoothly. Sudden length jumps look harsh and obvious.
At Lashes By Aree, our team avoids these mistakes through careful planning. We double-check our lash mapping eye shape guide choices. This attention to detail shows in our final results.
Lash Mapping for Different Extension Styles
Different extension styles need different mapping approaches. Understanding these differences expands your service offerings. More options attract more diverse clients.
Classic Lash Extensions
Classic lash extensions use the simplest mapping technique. One extension goes on each healthy natural lash. The map focuses mainly on length distribution. Curl selection also plays an important role here.
Our classic lash service uses precise mapping for natural looks. This style suits clients wanting subtle enhancement. It’s perfect for first time lash extension clients.
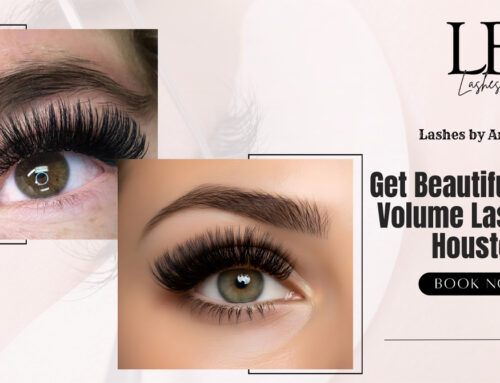
Volume Lash Extensions
Volume lash extensions require more complex planning. Multiple thin extensions form fans on each lash. Your map must account for added weight. Plan slightly shorter lengths than classic styles. The lash cluster map technique helps organize volume work. Group lashes into small sections for easier application. This keeps your work organized and efficient.
Hybrid Lash Extensions
Hybrid lash extensions combine classic and volume techniques. Your map shows which lashes get singles. It also shows which ones receive the volume of fans. This mixed approach creates beautiful texture. Check our hybrid lash options for inspiration. These versatile styles suit many different preferences. They balance natural and dramatic elements perfectly.
Each style showcases your lash mapping skills differently. Mastering all types makes you more valuable. Clients appreciate artists who offer many options.
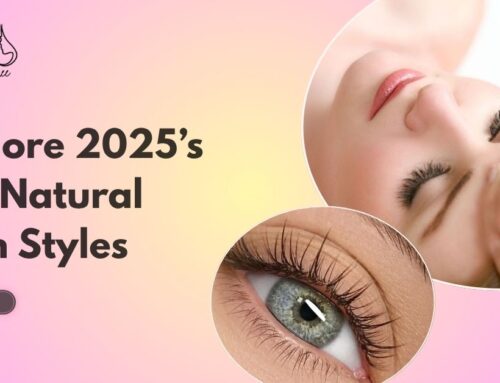
Conclusion
Lash mapping transforms good lash artists into great ones. This simple planning technique elevates every set you create. It ensures consistent, beautiful results for every single client.
We’ve covered everything from basic eye shapes to advanced techniques. You learned about different styles and common mistakes. You discovered tools that make mapping easier. Most importantly, you understand why mapping matters so much.
At Lashes by Aree, we use lash mapping for every client in Houston. This commitment to excellence built our reputation. Our clients trust us because we never skip important steps.

")